Flatten layers but keep them (Beginner level difficulty)
Flattening layers tend to be bad especially if you need to perform additional tweaks to the image. After the work for cutting out the figures and adding shadows, I need to merge it into a single layer to work the next step. Photoshop is able to merge the visible layers into a new layer for me to work on while leaving the original layers alone. By selecting the visible parts of the layers; I kept the background image off (making sure the eye icon is not on). Then press Ctrl-Alt-Shift-E. A new layer with the flattened visible elements is created.
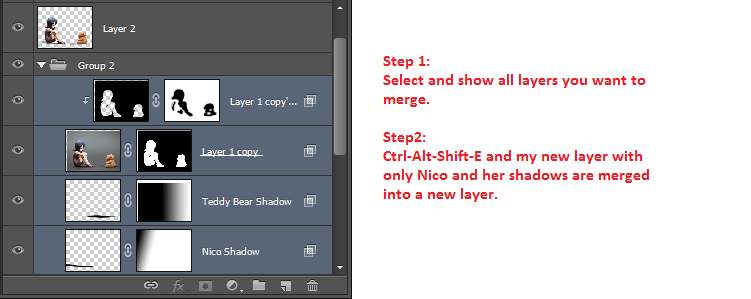
flatten layers but keeping the old layers for further tweaks
Smart Objects (Beginner level difficulty)
Understanding Smart Objects (Click here for more information)
Perform nondestructive transforms. You can scale, rotate, skew, distort, perspective transform, or warp a layer without losing original image data or quality because the transforms don’t affect the original data.
- Work with vector data, such as vector artwork from Illustrator, that otherwise would be rasterized in Photoshop.
- Perform nondestructive filtering. You can edit filters applied to Smart Objects at any time.
- Edit one Smart Object and automatically update all its linked instances.
- Apply a layer mask that’s either linked or unlinked to the Smart Object layer.
- Try various designs with low-resolution placeholder images that you later replace with final versions.
You can’t perform operations that alter pixel data—such as painting, dodging, burning, or cloning—directly to a Smart Object layer, unless it is first converted into a regular layer, which will be rasterized. To perform operations that alter pixel data, you can edit the contents of a Smart Object, clone a new layer above the Smart Object layer, edit duplicates of the Smart Object, or create a new layer.
At this point of the process, I’m near completion. However another obstacle stands in my way. The background image size is no where near the size I took the photo on. Background dimensions are 2560 x 1024 and my photos are 4032 x 3024.
Mismatch in dimension
This is where Smart Objects comes in handy. Typical if you enlarge a small picture it tends to pixelated since there isn’t enough information for the enlargement. But we’re going to use the Transform option to enlarge the background; Smart Objects are not affected with enlargement pixelation when being transformed with the Transform option. I’ll need to convert both the merged photo of Robin and the background into a Smart Object. I select the background layer, right click on the layer’s name and select Convert to Smart Object or from the menu bar: Layer -> Smart Objects -> Convert to Smart Object. Once that’s done you’ll notice a new smart object icon near the bottom right of the layer’s thumbnail.
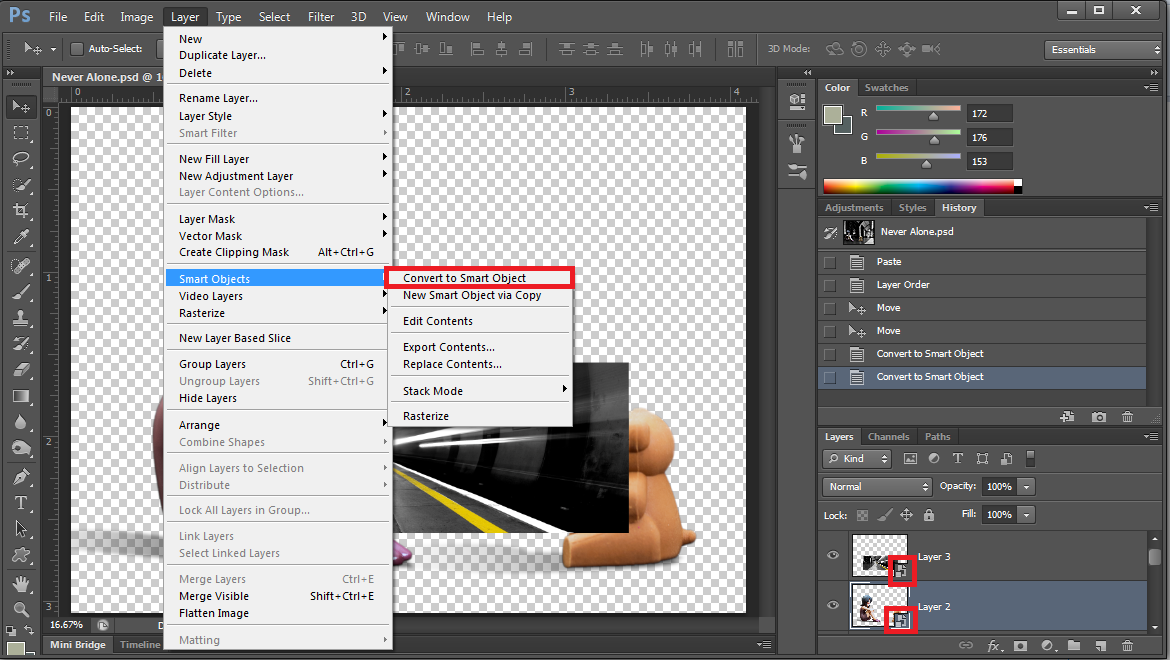
Smart Object
I use the Transform option, CTRL+T, then hold Shift key (this keeps proportions), and adjust the background by enlarging it. I perform the same thing with Robin except I am shrinking Robin down. Below is the comparison of the adjusted Robin against the original size. Background is enlarged to the size I liked.
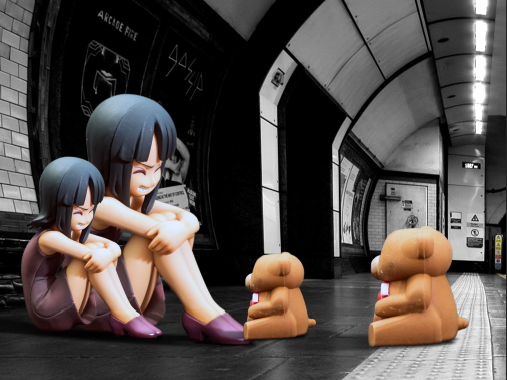
Comparison after smart objects are transformed