Selecting figure and masking the background technique(beginner to intermediate level difficulty)
As interesting as the focus stacking result was, it will not work with the background since the highlights are too bright and the direction of the light is incorrect. At this point I went and imported the shot I took with only the room light. I chose a dark contrasting background when I photographed the figures which will allow me to select the background off the photo. This technique works better with a chroma green backdrop but the downside is the green reflection that gets on the figures.
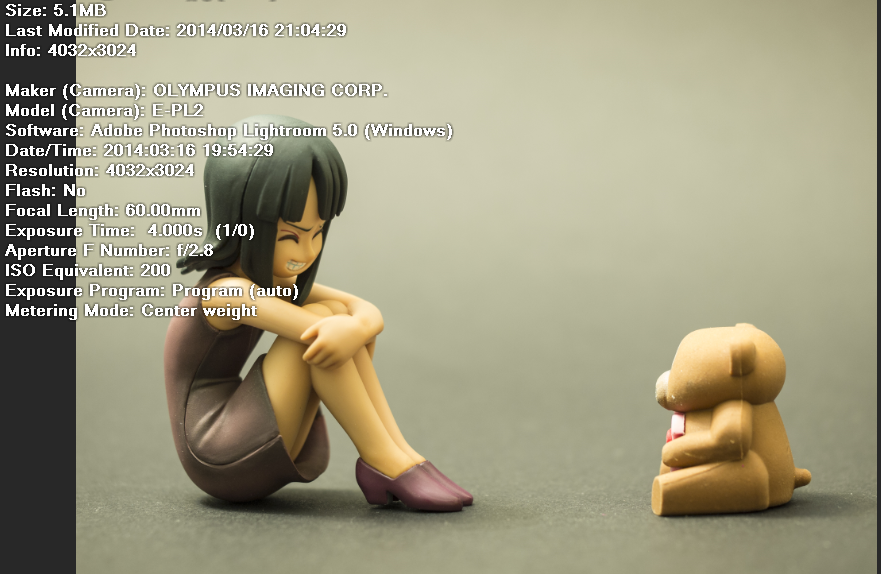
Using only the room light gave the best match when I compared the shot to the subway background.
Many of us are familiar with the Magic Wand tool. I’m not sure how many of us are familiar with the color range selection tool. As the name implies, this tool will help select a color range out of the picture.
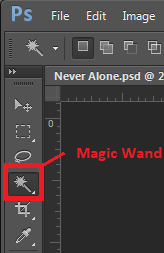
Nice but no Harry Potter wand…
This is why a contrasting background or green chroma background will help here. Below are two videos showing color range selection, the first one talks about using CS4 but the techniques are the same.
I selected Nico Robin’s layer, then from the tool bar Select -> Color Range

Color Range for selecting background out
The dropper tool here will select the background and it’s color range. In this case I needed to add more range to the color. By holding down the shift key on my keyboard I clicked areas where the background was still dark. I also played around with the fuzziness and range sliders to get an acceptable selection. The ultimate goal here is to have the background as close to white as possible while the figure silhouette is black.
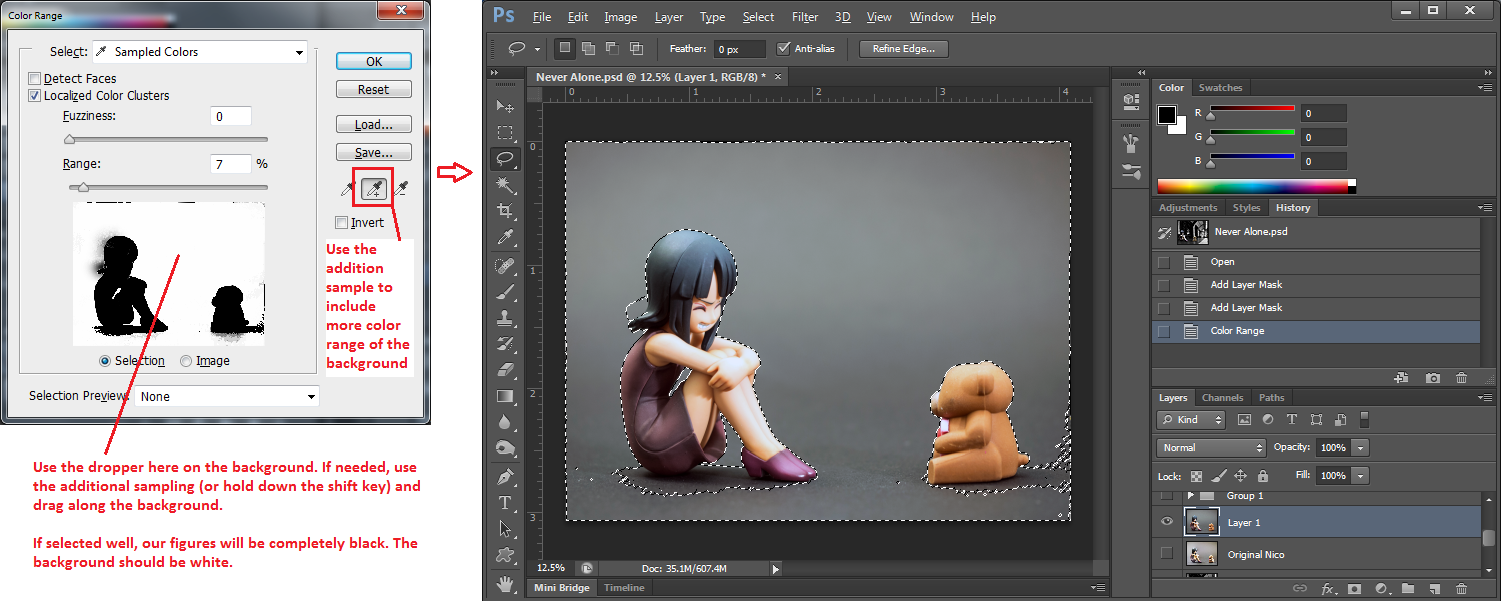
Background selected after color range selection. Not perfect but using the lasso tool or Quick Selection will help
The selection isn’t perfect at this point but it did select most of it. Also right now the selection’s focus is on the background but I also need to include the shadows so only the figures’ silhouette are excluded. I used a combination of Quick selection tool and the Lasso tool while holding down the shift to add to the current selection.
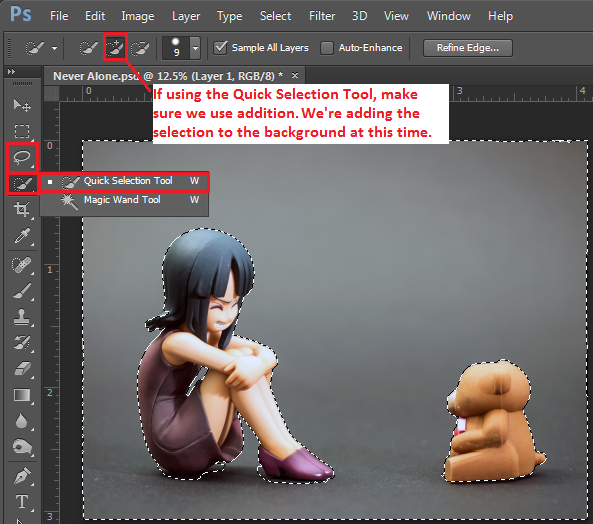
Selection Cleanup to add shadows that color range selection missed.
The background now properly selected, we can deleted it but in case something needs to be corrected it will prove to be difficult. Luckily we have masking as mentioned from the focus stacking technique! First we’ll inverse our selection from the background to the figures by clicking on Select -> Inverse. Next with the figure as the selection’s focus, we’ll click on the Mask button to mask out the background for us.
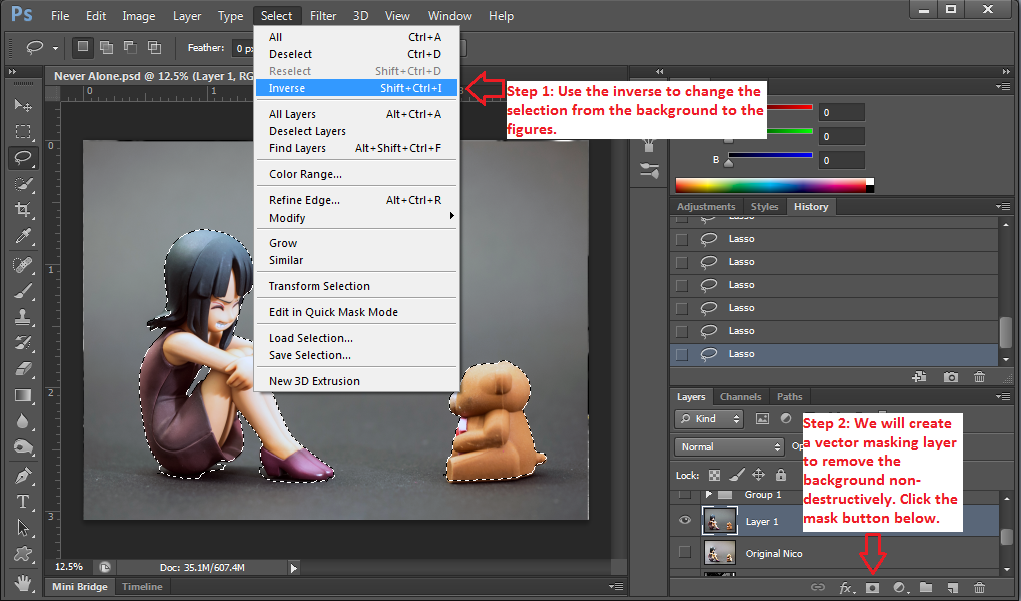
Inverse the selection and Mask the background out
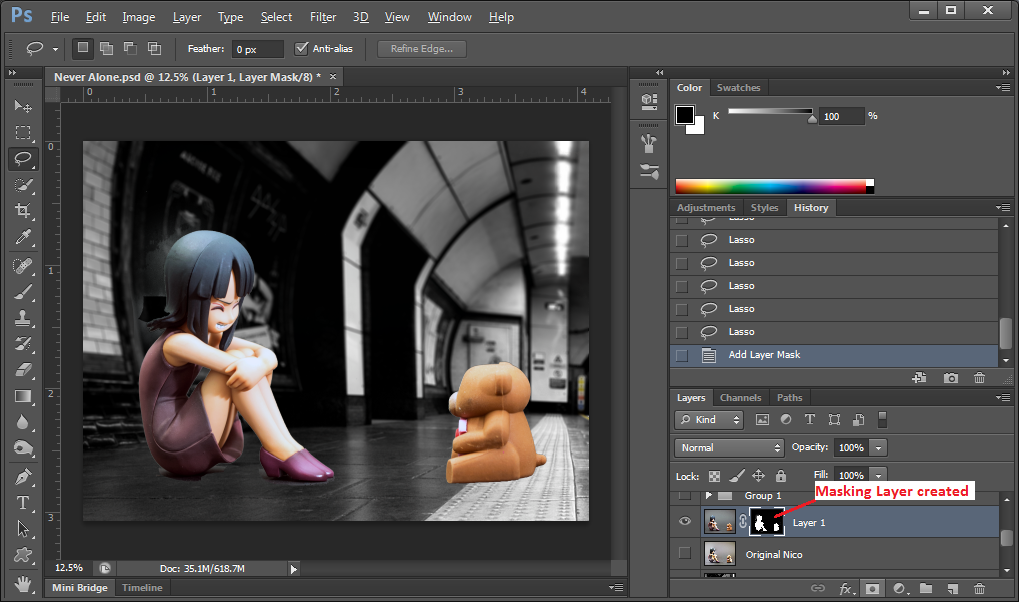
Masking completed and background that was covered shows through!
The masking isn’t perfect but that’s ok. We can click on the Masking Layer and paint areas we want hidden in black with a paint brush and vice versa.
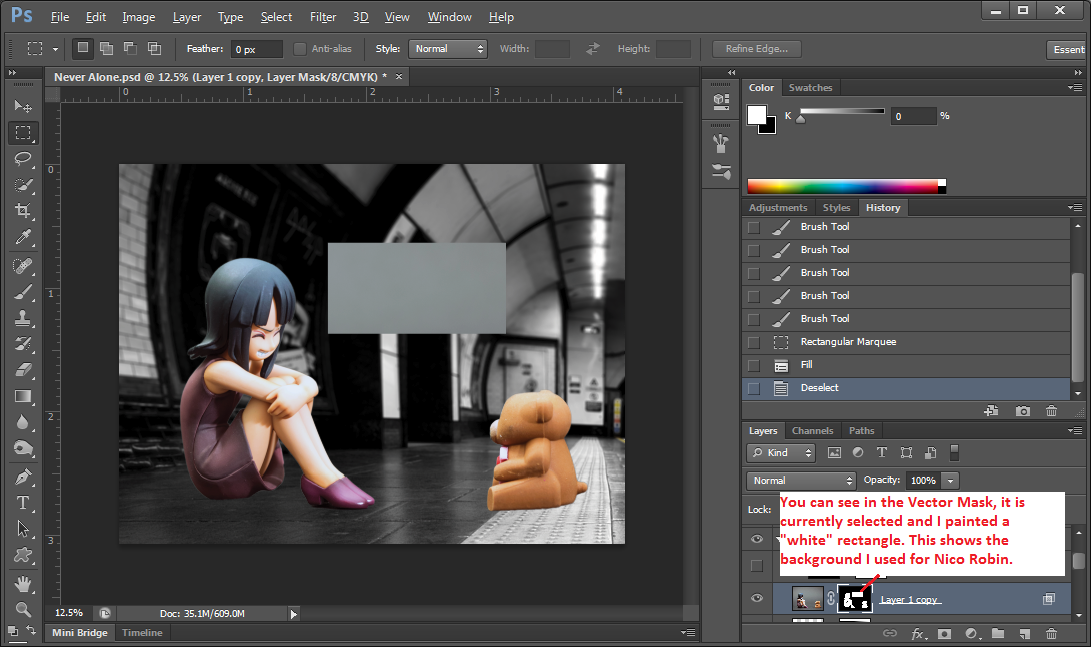
Masking correction