Photoshop Time! (Beginner to Intermediate techniques ahead)
Focus Stacking Technique (beginner level difficulty)
Focus Stacking – by Kev Vincent photography
Taking a series of pictures at different distances from the subject (without altering the lens focus distance) and stacking them together, will dramatically increase the Depth of Field on your close-up shots.
I’m not going to reinvent the wheel but what I’ve done with Nico Robin in the shots was keep the camera in the same position but lighting between the three shots are different. There’s a Macro Focus Stacking 101 youtube video by Jay SonyAlphaLab I watched a while back that explains in more detail. The video shows step by step on how focus stacking is achieved.
I utilized the focus stacking on the different lighting I did for Robin. I still selected all the photos of Robin. Then from Photoshop’s menu bar on the top, clicked on Edit -> Auto-Align Layers. I select the Auto option afterwards. Doing this align the images correctly for the most part and adjust them as needed since I know between shots the camera does shift a little and so does the image.

Focus Stack Menu Location
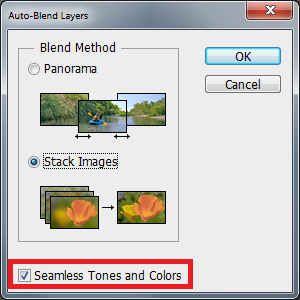
Once the images are aligned; leaving the images still selected, I go back to Edit -> Auto-Blend Layers. Then I select Stack Images with Seamless Tones and Colors selected.
Auto Blend options
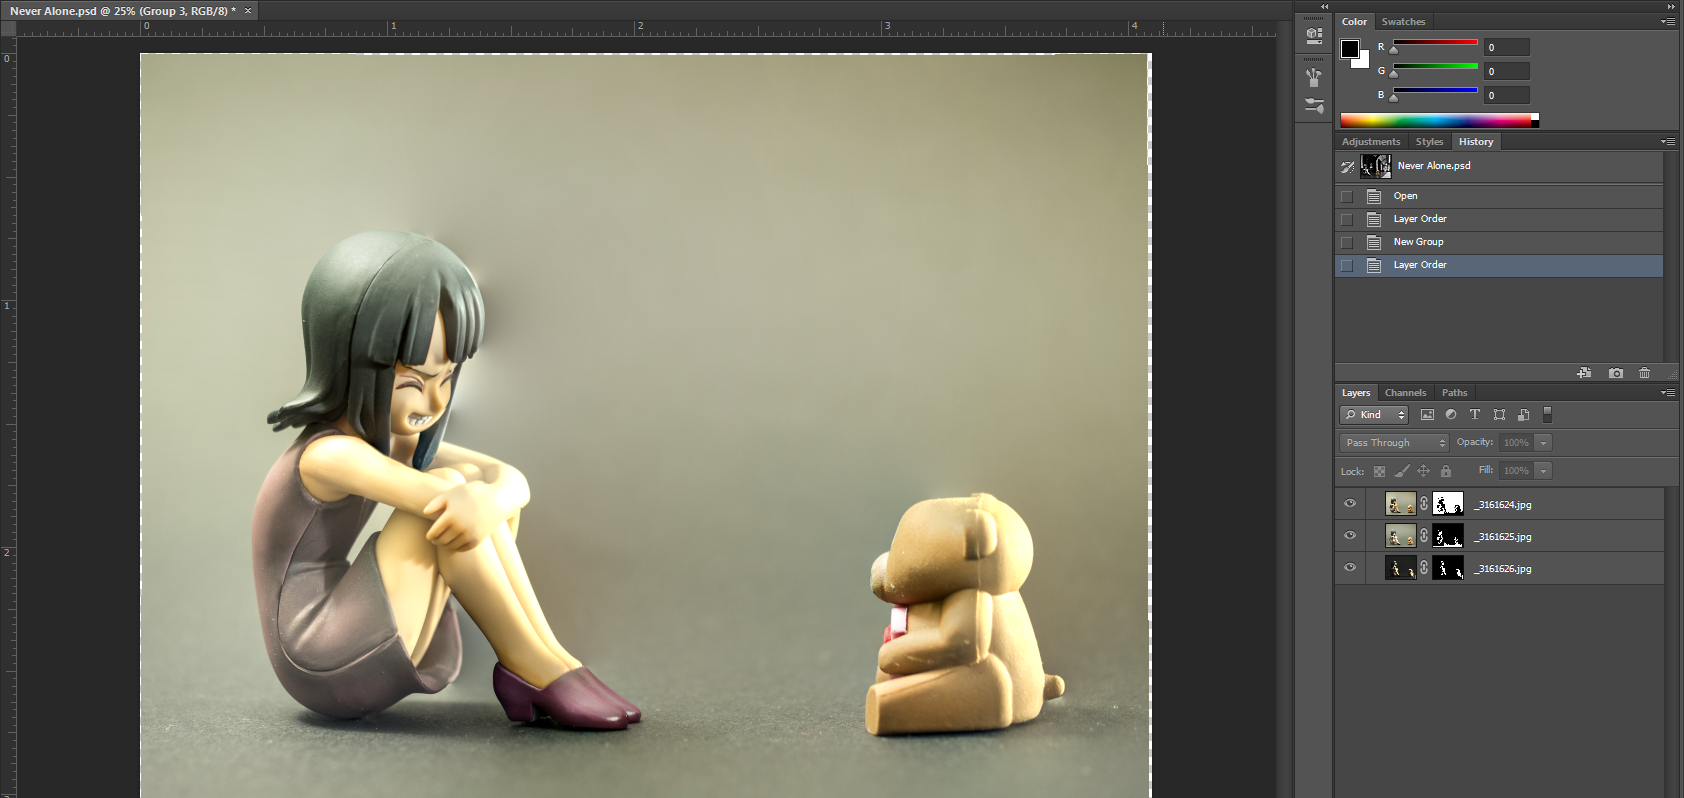
I ended up with an interesting rendition of Nico Robin below. However the result didn’t turn out to be what I wanted nor what I had in mind for the composite.
Focus Stack Results
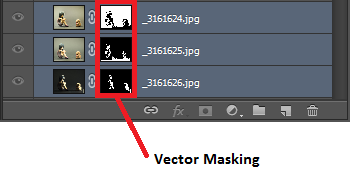
The Auto Blend layers function did not destroy the photos, it did a non-destructive masking. You’ll notice in the Layers window on the right of the image thumbnails there’s a black and white thumbnail. The white areas allow those parts of the image to show through and vice versa for the black areas. If I needed to revert back to the image stack, I can use history or click on the Individual mask thumbnail and drag it to the trash icon near the bottom right. –If you don’t click on the mask thumbnail and drag it to the trash, it will delete the entire layer–